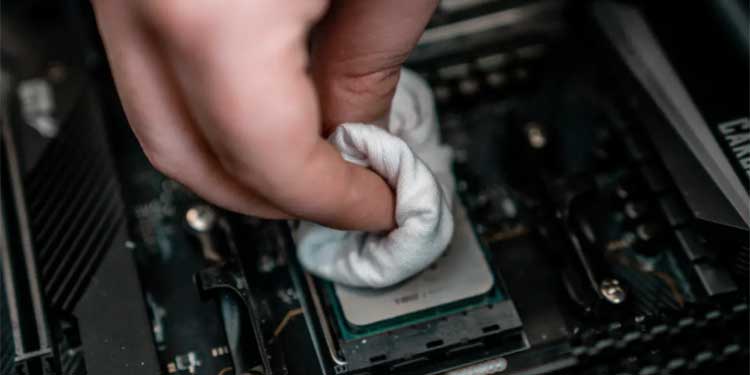
In this article, you will learn how to clean thermal paste off the CPU. Some users remove the heatsink and then use a brush with soapy water to clean the old thermal paste from the CPU/GPU, but this is not a good idea.
Importance of thermal paste:
The coolant is essential for your computer, and it prevents your CPU/GPU from overheating and turning itself off. Removing or damaging it can cause a shorter hardware lifetime.
Material required for clean thermal paste off CPU:
I’m going to explain to you know how to properly remove old thermal paste off CPU, using only materials that everyone must have at home:
- Isopropyl alcohol (best) or Ethanol (if you don’t have that). In both cases, better if they are 90+% pure as any impurities will negatively affect your paste.
- Of course, you will also need something to remove the CPU cooler and access to a good air source (a fan; if outside, use a compressor).
First, Prepare Your Workspace:
Isopropyl alcohol/Ethanol + cotton balls or some lint-free absorbent material. I recommend using cotton because it’s easy and cheap to clean and doesn’t leave fibers like towels sometimes do; towels are great for drying but not for cleaning materials since their threads can get stuck in the heatsink fins. Cotton pads are also used in makeup works (the thin ones) as they are designed for this type of job.
What you need:
- Alcohol (90% pure)
- Cotton balls thermal paste (I suggest Arctic Silver 5 or MX-2, both are great, and you can’t go wrong – do not use cheap pastes like Ceramique or others)
- A small long-handled brush or simply a cotton bud to apply the paste; make sure it’s lint-free and thin enough not to leave fibers (cotton pads work too).
- Some case fan. Again, I prefer good airflow over silence, so I recommend something that moves a lot of air and is relatively quiet; many fans fit this category. Remember that if your CPU/GPU fan has stopped spinning because of dust, you will need even more powerful case fan(s) to provide enough cooling for your PC as the heatsink is not sufficient anymore.
Read More:What Is Right of First Refusal Real Estate? Everything You Need To Know
Step-by-step guide:
When you are ready, follow the steps in the proper order to prevent any mistakes:
- Power off your computer and unplug it!
- Open your case(s) and locate all heat-sinks (and fans if they have them). Make sure that all of them are clean from dust, hair, pet hair, etc. Otherwise, you will need to blow air into your case with a compressor or use a can of compressed air to remove them – but this will damage most fan blades, so be careful! Remember that even one piece of dust can negatively affect your heat-sink performance.
- Depending on how dusty/dirty the inside is take a brush with soft bristles and gently brush away any visible dust/hair, etc.
- Use an air compressor (or a can of compressed air) to blow into any heat-sink fins, remember not to damage the blades on your fans – you can use your hands to remove dust from hard-to-reach places if you need too carefully; make sure you don’t leave dirt on critical components like capacitors or RAM slots (especially DDR2/DDR3).
- If possible, remove the fan(s) – even if they are fixed ones with no screws! Brush them with gentle strokes at least 20 cm away from them; this way, it’ll be easier for the cotton fibers to get into tight spaces.
- Use alcohol or Ethanol (better but not essential) and a lint-free material to clean the heat-sinks and fans; place one cotton ball on each, but don’t press it! Alcohol evaporates pretty fast, so you will need to apply a lot of it to make sure you remove all dust and then dry.
- Dry the alcohol (with compressed air or by waving your computer in the fresh air until no more moisture).
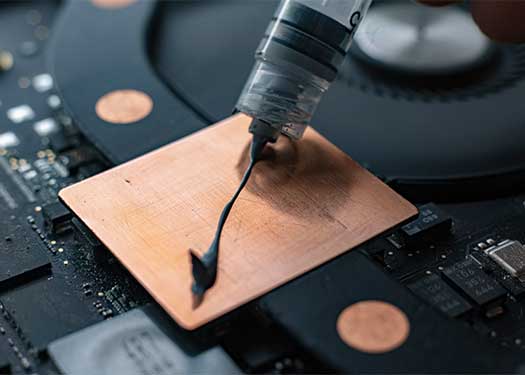
- Apply the thermal paste in an even, thin layer between CPU/GPU and heat-sink. If you are not sure how much to use, check the manufacturer’s website or add less than 1mm thickness from one side of the core to another – this should be good enough for 95% of users. I would recommend using Arctic Silver 5 or MX-2, both are top quality, and a little goes a long way. You can use a thin flathead screwdriver to spread it evenly, and now you know why those cheap pastes fail!
- Assemble your computer in the exact reverse order as you disassembled it – do not rush things, make sure everything is correctly inserted before powering on. Double-check that all heatsinks are fixed to the CPU/GPU, and fans are plugged back in their sockets.
- Power on your computer and cross your fingers.

Conclusion
Paper towels can be dipped in isopropyl alcohol (90% or 90%+). Take care not to damage the new paste while removing the old paste. To remove remaining old paste, wipe the edges of the processor with a cotton swab soaked in isopropyl alcohol.
FAQs
A: CPUs, especially laptops, come with a layer of thermal paste between the CPU and the heat sink, which is used to conduct heat from the CPU to the heat sink. Over time this thermal grease can become contaminated with dirt and other particles, which will reduce its effectiveness at conducting heat away from the CPU, thus leading to the CPU getting hotter than desired.
A: You can use rubbing alcohol or an alcohol-based cleaner to remove the thermal grease from the CPU.
A: You can use a cotton swab or other lint-free cloth to wipe the thermal grease from the CPU.
A: It doesn’t matter what order you go about cleaning the thermal grease off the CPU (i.e., horizontal or vertically).
A: The performance of the CPU will be improved because the thermal grease has been removed.
A: You will need rubbing alcohol (or an alcohol-based cleaner) and lint-free cloths (like cotton swabs).


