Floating shelves above the toilet turn the most wasted wall in the bathroom into real storage. Hang the lowest shelf about 20 to 26 inches above the tank lid, space any others 10 to 14 inches apart, pick a material that tolerates humidity, and fix the brackets into studs or heavy-duty anchors. Get those four details right and you gain room for towels, paper and toiletries without losing any floor space.
Below you will find the measurements that matter, a material comparison, the right hardware for drywall, tile and plaster, a step-by-step installation, what to store and what to keep off, design ideas, and the mistakes that cause sagging or wobbly shelves.
Why the Wall Above the Toilet Is Worth Using
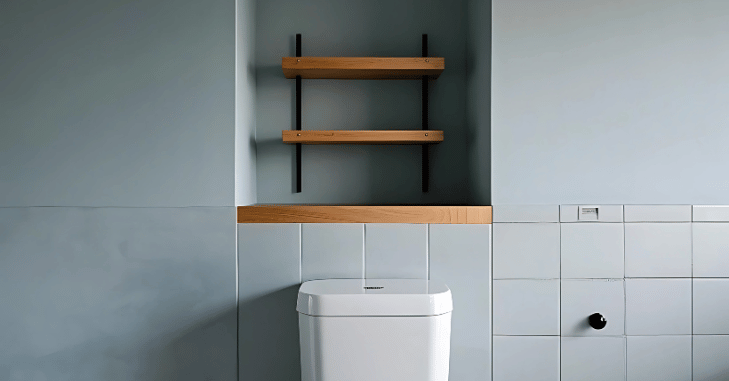
In most American bathrooms the space above the toilet is a strip of bare wall roughly 20 to 30 inches wide running from the tank to the ceiling. Nothing else fits there, because the toilet needs clearance in front and the vanity usually sits beside it. That makes it one of the few spots where you can add storage without making a small room feel smaller.
Floating shelves suit this spot better than a bulky over-the-toilet cabinet or a freestanding etagere:
- No legs to clean around. Freestanding “space saver” units put feet beside the toilet base, the hardest part of the bathroom to keep clean.
- Less visual weight. Open shelves with hidden brackets read as part of the wall, so the room still feels open.
- Flexible layout. You decide the number of shelves, depth and spacing to fit what you actually store.
- Affordable. A set of two or three ready-made shelves often costs roughly $25 to $120 at big-box stores, far less than a custom cabinet.
Floating shelves vs other over-toilet storage
| Option | Pros | Cons | Best for |
|---|---|---|---|
| Floating shelves | Clean look, flexible spacing, easy to clean below | Need solid anchoring; open storage shows clutter | Most bathrooms, especially small ones |
| Wall cabinet | Hides clutter, protects items from dust | Heavier, bulkier, needs stud mounting | Families with lots of toiletries |
| Freestanding etagere | No drilling, quick to set up | Legs collect grime, can wobble | Renters |
| Tension-pole shelving | No holes, adjustable height | Less stable, utilitarian look | Short-term or rental fixes |
Measurements That Make Shelves Above the Toilet Work
Most problems with over-toilet shelves come from bad measurements rather than bad shelves. Measure before you buy anything.
| Measurement | Typical guideline | Why it matters |
|---|---|---|
| Tank lid to first shelf | 20 to 26 inches | Leaves room to lift the lid for repairs and keeps heads clear when standing |
| Spacing between shelves | 10 to 14 inches | Fits rolled towels, baskets and toilet paper without wasted gaps |
| Shelf depth | 6 to 10 inches | Deeper shelves stick out over the tank and feel crowded |
| Shelf width | Equal to or slightly wider than the tank (often 20 to 30 inches) | Looks centered and balanced |
| Top shelf height | Within easy reach, usually under about 72 to 76 inches from the floor | Items higher than that get forgotten or knocked down |
Two extra checks save headaches. First, lift the tank lid and note how high your hand goes; sooner or later someone will need to replace a flapper or fill valve. Second, look for obstacles such as a medicine cabinet, light fixture, fan switch or window trim that would clash with the shelf ends.
How many shelves should you hang?
Two shelves suit most standard 8-foot ceilings and keep the wall from looking crowded. Three work if you have taller ceilings or need serious storage, but keep the top one for lighter, less-used items. A single long shelf can look sparse unless it holds a few larger pieces, such as a basket and a framed print.
Choosing Materials That Handle Bathroom Humidity
Shower steam is the main enemy of bathroom shelving. Raw particleboard swells, and unsealed wood can cup or grow mildew. Here is how the common options compare.
| Material | Moisture resistance | Look | Notes |
|---|---|---|---|
| Sealed solid wood (oak, walnut, pine) | Good if finished on all sides | Warm, natural, farmhouse or modern | Seal the back and ends too, not only the top |
| MDF or particleboard with laminate | Fair; weak at cut edges and screw holes | Clean painted or wood-grain finish | Budget-friendly; best in well-ventilated rooms |
| Tempered glass | Excellent | Light, airy, contemporary | Shows water spots and dust; needs frequent wiping |
| Metal (powder-coated steel, stainless) | Very good if coated | Industrial or minimalist | Cheap uncoated steel can rust near showers |
| Acrylic or PVC | Excellent | Modern, can look plasticky | Lower weight limits |
If you build your own wood shelves, finish them with a water-based polyurethane or marine-style varnish and let the finish cure fully before loading. Good ventilation helps every material; running the exhaust fan for 15 to 20 minutes after a shower reduces the moisture that also damages paint. If you are refreshing the room at the same time, our guide to the best paint for a bathroom ceiling explains which finishes resist peeling and mildew.
Hardware: Match the Anchor to Your Wall
“Floating” shelves hide their support inside the shelf, usually on steel rods or a rail screwed to the wall. That hidden bracket carries the entire load, so it needs a solid connection.
| Wall type | Best fastening | Tips |
|---|---|---|
| Drywall over wood studs | Wood screws at least 1.5 inches into the stud | Studs are usually 16 inches on center; a 24-inch shelf often catches one, sometimes two |
| Drywall with no stud | Toggle bolts or snap toggles | Skip the plastic ribbed anchors in the box for anything heavier than decor |
| Tile over backer board | Anchors rated for the substrate behind the tile | Drill with a carbide or diamond bit through painter’s tape, slowly and without hammer mode |
| Plaster and lath | Screws into studs wherever possible | Drill carefully to avoid cracking; plaster crumbles around weak anchors |
One important caution: plumbing often runs in the wall behind the toilet, including the supply line and sometimes the vent stack. Stay a few inches away from where the supply valve enters the wall, and if you own a scanner that detects pipes and wiring, use it before drilling.
How to Install Floating Shelves Above the Toilet
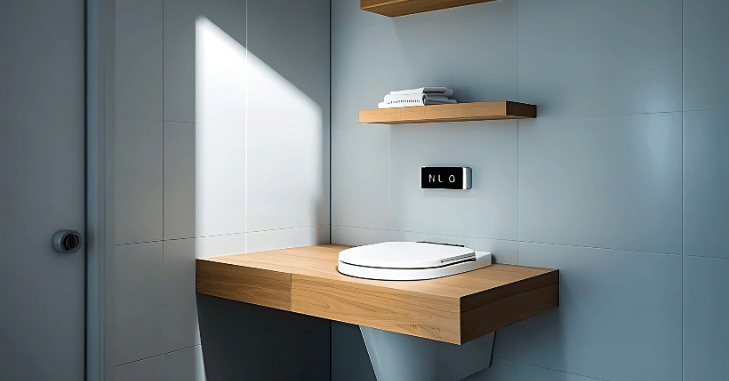
A confident beginner can hang two or three shelves in an afternoon. You will need a drill, stud finder, a level at least 24 inches long, tape measure, pencil, painter’s tape and the correct anchors for your wall.
1. Mark the centerline
Measure the tank width and mark its center on the wall. Shelves that line up with the toilet look intentional, even if the wall itself sits off-center between the vanity and the corner.
2. Tape out the layout
Outline each shelf with painter’s tape at the heights you picked. Stand back, sit down, lift the tank lid, and live with it for a day if you are unsure. Tape is cheap; patching holes is not.
3. Find studs and mark drill points
Locate studs within the taped area. Hold the bracket against the wall, level it and mark every hole. Use a stud wherever a hole lands on one and plan heavy-duty anchors for the rest.
4. Drill and mount the bracket
Drill pilot holes, install anchors where needed, then screw the bracket on. Check level again before fully tightening, because a bracket that is slightly off will make the shelf visibly tilt.
5. Slide on the shelf and lock it
Most floating shelves slide over the rods and lock with a small set screw underneath. Tighten it so the shelf cannot be lifted off by accident. Measure each additional shelf from the one below rather than from the floor, which may not be level.
6. Load gradually
Put the heaviest items, such as stacked towels, toward the wall and on the best-anchored shelf. Watch for any droop over the first week before adding more.
What to Store and What to Keep Off
Shelves above a toilet work best for lightweight, often-used or decorative items. An easy system is to organize by frequency: daily items on the lowest shelf, backups in the middle, decor on top.
- Good choices: rolled or folded hand towels, spare toilet paper in a lidded basket, cotton balls and swabs in glass jars, a small plant such as pothos or snake plant, a candle or reed diffuser, framed prints.
- Keep elsewhere: medications (bathroom heat and humidity can affect them, and they belong out of children’s reach), glass bottles that could fall and crack the tank lid, and anything heavy stacked near the shelf edge.
Baskets and bins do a lot of the work. They hide mismatched packaging, stop small items from falling, and make it easy to pull everything down for cleaning. Shelves with a small front lip or rail add security if you have kids or pets.
Design Ideas for Floating Shelves Above the Toilet
Warm wood with woven baskets
Stained oak or reclaimed-look pine with seagrass or rattan baskets suits farmhouse, coastal and Scandinavian styles. Keep the color palette small so the wall looks calm rather than busy.
Matte black or wall-color shelves for small bathrooms
Painting shelves the same color as the wall makes them almost disappear, ideal for a tiny powder room. Black shelves against a light wall do the opposite and create a crisp graphic line.
Glass and chrome for a light look
Glass shelves let light pass through and pair well with polished fixtures. Plan to wipe them often, because every water spot shows.
Industrial pipe shelving
Wood planks on black iron pipe fittings are not technically floating, but they hold more weight and suit lofts and urban apartments. The fittings are heavy, so anchor them into studs.
Shelves combined with a cabinet
A shallow wall cabinet with an open shelf below gives you closed storage for less attractive items and a display surface for the rest. For more style directions, see our roundup of kitchen and bathroom remodeling trends.
DIY vs Buying Ready-Made Shelves
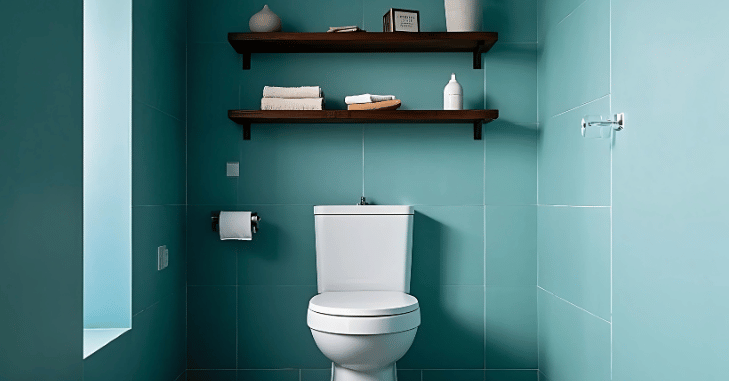
Ready-made kits are the quickest route and include matched hardware. Building your own gets you an exact width and a thicker, more substantial look. A common DIY method is a hollow box shelf: a frame of 1×2 lumber fixed to studs, with a plywood or solid-wood box sleeved over it and finished to match your trim. Hidden steel floating-shelf brackets, sold separately, are another route and let you use a solid board of any species.
If you rent, look at adhesive shelves rated for bathrooms, tension-pole shelving that stands behind the toilet, or ask your landlord whether small screw holes are acceptable. Many leases allow minor holes if you patch them when you move out.
Common Mistakes to Avoid
- Hanging the first shelf too low, so the tank lid cannot come off or people bump their heads.
- Relying on the included plastic anchors for a shelf that will hold towels.
- Choosing shelves that are too deep, which crowds the room and puts items right over your head.
- Leaving wood unsealed on the back and ends, where moisture gets in unseen.
- Drilling blind near the supply line, risking a punctured pipe behind the wall.
- Overfilling. Open shelving looks best at about two-thirds full, and it is easier to dust.
If you need more storage than a bathroom can offer, the same planning principles apply elsewhere; our guide to outdoor cabinet storage covers weather-resistant options for patios and garages.
What Floating Shelves Above the Toilet Cost
Budgets vary mostly with material and whether you pay someone to hang them. These are typical ballpark ranges, so check current prices locally.
| Item | Typical cost range | Notes |
|---|---|---|
| Ready-made laminate or pine shelf set (2 to 3 shelves) | About $25 to $70 | Hardware usually included, but anchors are often light-duty |
| Solid hardwood or glass shelves | About $60 to $200+ | Price climbs with thickness, species and length |
| Heavy-duty toggle anchors | About $8 to $20 per pack | Worth buying even if the kit includes anchors |
| Tile drill bit | About $10 to $25 | Needed only for tiled walls |
| Handyman installation | Often a one- or two-hour minimum charge | Useful for tile, plaster or very heavy shelves |
Cleaning and Maintenance Tips
Shelves over a toilet collect dust, hairspray residue and the fine mist that comes with every flush, so give them a quick wipe once a week. A microfiber cloth dampened with mild soapy water is safe for sealed wood, painted MDF, metal and glass; avoid soaking laminate edges. Close the toilet lid before flushing to cut down on spray reaching the lowest shelf.
Every few months, take everything down and check the set screws and wall fasteners, especially on shelves that carry towels. Re-tighten anything loose, touch up any chipped finish on wood or MDF before moisture gets in, and look for gaps opening between the shelf and the wall, which is an early sign the anchors are pulling out.
Bottom Line
For most bathrooms, two sealed wood or powder-coated shelves, 6 to 10 inches deep, hung about 24 inches above the tank and screwed into at least one stud, give the best mix of storage, looks and strength. Tape out the layout first, keep heavy items near the wall, and use baskets to keep the shelves tidy.
Frequently Asked Questions
How high should floating shelves be above a toilet?
A common guideline is 20 to 26 inches from the top of the tank to the bottom of the first shelf, with additional shelves 10 to 14 inches apart. Make sure you can still lift the tank lid comfortably.
How much weight can a floating shelf over a toilet hold?
It depends on the bracket and how it is anchored. Shelves screwed into studs typically hold far more than those on drywall anchors, so follow the manufacturer’s rating and keep heavy items near the wall.
What is the best material for bathroom floating shelves?
Sealed solid wood, tempered glass, powder-coated metal and acrylic all handle humidity well. Laminated MDF is a budget option but can swell if water reaches its edges.
Can I install floating shelves on tile?
Yes. Use a carbide or diamond tile bit, drill slowly through painter’s tape, and use anchors suited to the wall behind the tile. Avoid drilling near the toilet supply line.
How deep should shelves above a toilet be?
Six to 10 inches is the usual range. Anything deeper tends to hang over the tank, feel crowded and put items directly above your head.
Are there renter-friendly options?
Adhesive shelves rated for bathrooms and tension-pole units that stand behind the toilet avoid drilling. Otherwise, ask your landlord whether small, patchable screw holes are allowed.


