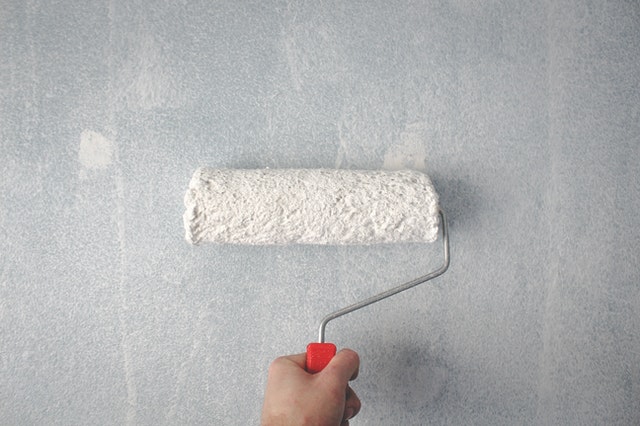
When you repaint your walls, three things decide whether the result looks professional: how well you clean and protect the room, how carefully you patch and sand, and whether you prime properly before choosing and applying color. Paint itself is the easy part. Most disappointing paint jobs, with visible patches, peeling or streaky color, trace back to skipped prep. Here is how to handle each stage, plus the tools, paint quantities and finishes that make the job go smoothly.
Before you start: tools and supplies
Having everything on hand keeps a weekend project from turning into three trips to the hardware store. For a typical bedroom you will want:
- Drop cloths, painter’s tape and a screwdriver for outlet and switch covers
- Sponges, a bucket and a mild cleaner (dish soap or a vinegar solution)
- Spackle or lightweight joint compound, a flexible putty knife and a wider taping knife
- Fine-grit sandpaper or a sanding sponge (around 120 to 220 grit)
- Primer, paint, a 2 to 2.5 inch angled brush for cutting in, a roller frame, roller covers and a tray
- An extension pole for ceilings and tall walls
1. Clean and prepare the room
Empty the walls first: artwork, shelves, curtain rods, nails and hooks. Remove outlet and switch plates and keep the screws in a labeled bag. Move furniture to the center of the room and cover it. Lay framed pictures face-down on a bed or sofa so they cannot tip and crack.
Protect the floor
Floor protection matters more than people expect. Plastic sheeting is fine for covering furniture or catching ceiling drips, but on the floor it becomes slippery when wet and paint drops sit on top and get tracked around. Old bedsheets let paint soak through and bunch up underfoot. A heavy canvas drop cloth lies flat, absorbs small drips and is reusable for years, which makes it the better choice along walls and in walkways. Tape the edges of carpet or use a cloth wide enough to slide under baseboards.
Wash the walls
Paint does not stick well to grease, dust or grime, especially in kitchens, hallways and around light switches. Wipe walls with a damp sponge and a mild cleaner. A simple mix of warm water and a little dish soap works, as does a diluted white vinegar solution for greasy spots. Rinse with clean water so no residue is left behind, then let the walls dry completely. While you wash, mark holes, cracks and dents with a pencil or small piece of tape so you can find them later.
2. Patch and sand for a smooth surface
Run your hand across each wall in raking light (a flashlight held flat against the surface helps). You will feel bumps and find small holes you did not notice. Scrape off any loose paint or raised edges around holes with the edge of your putty knife.
- Nail holes and small dents: fill with lightweight spackle in one pass, pressing it in and scraping flush.
- Larger dents and cracks: apply two or three thin coats of joint compound, letting each dry, instead of one thick coat. Thin coats dry faster, shrink less and need less sanding.
- Holes bigger than a doorknob: use a self-adhesive mesh patch or a drywall patch kit before applying compound.
- Gaps along trim: fill with paintable acrylic caulk rather than spackle, since caulk flexes.
When the patches are fully dry, sand them lightly until you cannot feel an edge. Wipe away the dust with a damp cloth, or vacuum as you go with a shop vac. For bigger areas, an orbital or detail sander saves time; our review of the Garvee electric sander covers one option for fine sanding. If your home was built before 1978, test for lead before sanding old paint and follow lead-safe practices.
3. Prime, then choose and apply color
When you need primer
Every patch needs to be spot primed. Bare joint compound absorbs paint differently from the painted wall around it, which causes dull, visible spots called flashing. Prime the whole wall when you are going from a dark or bold color to a light one, painting over glossy paint, covering stains or water marks, or painting new drywall. A stain-blocking primer is worth it for smoke, marker or water stains.
“Paint and primer in one” products can work well when you are repainting a clean wall in a similar color. They are less reliable over heavy patching, stains or a big color change, where a dedicated primer coat usually gives a more even finish.
Pick the right finish
| Finish | Look | Best rooms | Trade-off |
|---|---|---|---|
| Flat or matte | No shine, hides flaws | Ceilings, adult bedrooms | Harder to scrub |
| Eggshell | Soft, low sheen | Living rooms, bedrooms, hallways | Shows some wall flaws |
| Satin | Slight sheen | Kitchens, kids’ rooms, busy hallways | Highlights patches and roller marks |
| Semi-gloss | Noticeable shine | Trim, doors, bathrooms | Shows every imperfection |
For bathrooms, moisture resistance matters as much as finish; see our guide to the best paint for a bathroom ceiling for mildew-resistant options.
Test your color in real light
Colors shift a lot between the store and your room. Buy sample pots or peel-and-stick samples and put large swatches on two or three walls. Look at them in the morning, afternoon and at night under your own bulbs for a few days. North-facing rooms tend to make colors look cooler and darker, while south-facing rooms warm them up.
How much paint to buy
One gallon typically covers roughly 350 to 400 square feet per coat on a smooth, primed wall; check the can for your product. Measure the perimeter of the room, multiply by the ceiling height and subtract about 20 square feet per door and 15 per window. Plan on two coats. A standard 12 by 12 foot bedroom with 8 foot ceilings usually needs about two gallons for two coats of walls.
Apply it like a pro
- Top down: paint the ceiling first, then walls, then trim.
- Cut in first: brush a 2 to 3 inch band along ceilings, corners and trim, one wall at a time, so it blends with the rolled paint while both are wet.
- Roll in sections: work in roughly 3 by 3 foot areas using a W or M pattern, then fill in without lifting the roller, keeping a wet edge.
- Do not overwork it: once paint starts to get tacky, move on. Going back over half-dry paint leaves marks.
- Wait between coats: most latex paints are dry to recoat in a few hours; follow the label.
- Pull tape while the last coat is slightly wet or cut along the edge with a utility knife to avoid peeling.
Buy decent brushes and roller covers. Cheap roller covers shed lint into the finish, and cheap brushes leave streaks along the edges. You do not need the most expensive tools, but mid-range ones pay for themselves in fewer touch-ups.
Common repainting mistakes to avoid
- Painting in a cold or very humid room, which slows drying and can leave a tacky finish
- Loading the roller too heavily, which causes drips, runs and a textured “orange peel” look
- Mixing cans from different batches without boxing them (pouring them together in a larger bucket) first
- Rehanging art or pushing furniture back against walls before the paint has had a day or two to harden
DIY or hire a painter?
Most homeowners can paint a bedroom or living room themselves over a weekend for the cost of supplies. Hiring a painter makes sense for high ceilings and stairwells, large amounts of drywall repair, very dark to light color changes across a whole house, or when your time is worth more than the labor cost. Professional prices vary widely by region and scope, so get a few written quotes that spell out prep work, number of coats and paint brand. If you are planning other seasonal upgrades too, see our list of home improvement projects to do this spring.
Frequently asked questions
Do I need to wash walls before painting?
Yes, at least wipe them down. Dust and grease weaken paint adhesion, especially in kitchens, hallways and around switches. Let walls dry fully before painting.
Can I skip primer when repainting?
Sometimes. If the wall is clean, sound and a similar color, a quality paint may cover without primer. Always spot prime patches, and prime fully for dark-to-light changes or stains.
How many coats of paint do walls need?
Two coats is standard for even color and durability. Big color changes may need primer plus two coats.
Is canvas or plastic better as a drop cloth?
Canvas is better for floors because it lies flat, absorbs drips and is not slippery. Plastic works well for covering furniture and catching ceiling drips.
What paint finish is best for walls?
Eggshell is a common all-around choice for living areas and bedrooms. Use satin in high-traffic or damp areas and flat on ceilings.


